Showing posts with label Chronicles' Project. Show all posts

Thursday, February 9, 2012

Training for the Outdoors: Get Ready for Spring!

Easy way to get in shape for hunting season!
© 2012 Albert A Rasch and
The Rasch Outdoor Chronicles

Train Your Way to Better Hunting
Train for Endurance

Y'all remember this post of 2009? I was at 212 lbs, and dragging butt.

US Army Training Center & Fort JacksonImage via Wikipedia

After seeing the Bear at Fort Jackson, I was motivated by the lines of recruits scampered to and fro while being yelled at, their bodies being forged and hammered by their kind and conscientious drill sergeants, and finally drawn and tempered into finely honed fighting members of the United States Army. I'm telling you, it was as if I was reliving my youth as I watched the activities, washing down my slice of stuffed crust, extra cheese, Italian sausage pizza with a Super Big Gulp of Pepsi.

As I looked down at my extended midline, I was reminded of the fact that hunting wild game can be an athletic adventure, and I should plan on getting myself in shape before the season starts. Quite frankly I'm in decent shape, my blood pressure is low, cholesterol is low, and overall I'm pretty good. But my endurance is not what it once was. And endurance is what determines what physical demands you can place on your body.


Image: acetosa
I spend a lot of time behind the keyboard when I am at home, and I spend a considerable amount of time sitting while driving and while at work. I'm sure many of you do the same. I did a little research and decided it was high time I not only got back in shape, but make a change in the way I have been leading my life. No I am not going vegetarian, nor am I going to give up calzones, lasagna, chocolate chip cookie dough ice cream, and big hunks of red meat. What I am going to do is get regular exercise, and moderate my intake of food.

The goal is to design a program that will reflect the needs of a hunting sportsman, build up endurance, and tone up the muscles. Remember we are not looking for gains in size and large increases in strength, we want endurance.

Repetition and time are the key ingredients of endurance. But how are we going to go about it?
Image: MoonJazz
Rules of the Game:
You have to have a modicum of discipline.
You must think before you act.
It helps if you have a partner that's willing to support you.
Write down your plan of action.
Then get started!

First things first. Decide you want to do this. If you can't make even a small commitment to the regimen then forget about it. You must decide you are going to make time every day to get yourself back in shape. Decide if anyone else is with you on this. The truth is it is easier if you have someone that will do it alongside you.

So where are you now? Don't even think of going out there and doing a Rocky in the Russian mountains or anything like that. Let's think before we act!

If you've been on your rear end for the last nine months, then a little walking might be the way to go. Get a decent set of hiking boots, if that is your proclivity, but wait a while before you lace them on. Let's start with sneakers or walking shoes. You will also need a watch that is easily read, or a stopwatch.

Find a place where you can walk undisturbed and proceed to take a brisk and invigorating walk. Go from point A to point B and time it. Use that as your initial marker. Now try to do a little more a little faster every day. Once you are motivating for thirty minutes at a good pace, switch to those hiking boots. Make sure you have good socks on and that the boots fit is correct. I recommend Darn Tough Vermont socks which are by the way the Official Socks of The Rasch Outdoor Chronicles.

Make sure you do some moderate stretching before you start, each and every time it really does help prevent injuries.

See if you can find a piece of 1.25 or 1.5 inch black iron pipe that's about 3 foot long. Nice to carry a bit of weight in your arms to simulate that rifle during season.
Image:100pushups
A great tip I picked up is the 5 repetition push-ups during those moments between TV shows, or between desk and door. It's not enough to make you sweat or get out of breath, but it is enough to help you gain strength. You can increase them little by little over the summer and into the fall. I'm up to 25 reps, and I do them 3 to 5 times per day. It takes less than 20 seconds, and considering I started at ten sloppy ones a few weeks ago, I'm pretty pleased.

The other exercise I recommend is the good old sit up. Abdominal strength is the key to core strength, and ultimately determines factors like back strength and alignment, and hip alignment. These factors help with your balance and help prevent and minimize back injuries.

Wedge those feet under a piece of furniture, keep your knees bent, and fold your arms across your chest. Don't pull your chin into your chest as you lift, just bend it modestly as you start to lift off. Suck that gut down to your spine as your shoulders leave the ground and continue the lift in a controlled manner. Go back down in the same controlled fashion. Do what you can with proper form, and add to it as your strength increases. Sit ups are my evening exercise and I try to do as many as I can the first time, and follow it up with a set or two more, doing as many as my abs will allow.

Back in my Army days we used to "slap our boots." Basically we would squat, back relatively straight, until we could swat the top of our boots. This is a great exercise that you can do at any moment, quickly, and with great effect. It works your quads well, and helps with balance. I do ten reps whenever I remember. You can do them slow, or pick up the pace when you're in a hurry.

I thought of this a little while ago. We tend to stick to things we like. Don't fall into the trap of only doing what you like or are good at. Try to work on every part equally! Legs, abs, upper-body, they are all equally important.

That's my current regimen; walking, push ups, sit-ups, and squats. I do other odd-ball things as the mood or opportunity strikes me like pull-ups, chair dips, arm raises, and jumping jacks. Anything at anytime that is convenient. The key is to be doing something constructive and healthy for your body.

Stop and think for a moment how much time you spend doing a good job for your employer, or how much time you spend keeping that car or boat in great shape, or blogging. Don't you think you deserve the same care and consideration?

Repetition is the key to endurance. Keep adding repetitions as you gain in strength and endurance and before you know it, even the Mrs will notice the improvements in your physique...


SO WHAT ARE YOU WAITING FOR? GET UP AND SLAP THOSE BOOTS!!!

NOW!
Epilouge: It helped that I have been in Afghanistan for some time now, but at home I stay at about 185 lbs. That's without watching what I eat, other than from the plate to my mouth. I do moderate the amount of ice cream i consume, and I pretty much avoid soda pop, but other than that I don't limit myself much. I walk everyday, bicycle as often as possible, and knock out a few push-ups, sit-ups, and the occasional motivated run up a couple of flights of stairs to keep the weight in check.

The Rasch Outdoor Chronicles

Monday, January 30, 2012

Making a European Skull Mount with Wild Ed!

Making a European Skull Mount with Wild Ed!
© 2009 - 2012 Albert A Rasch and
The Rasch Outdoor Chronicles
$g&m f9bd 45kd q!?5.

"To say he was surprised to find out I had done my own and the cost was under $10.00 per skull for chemicals and $35.00 for the wood plaque to hang it on the wall was an under statement."
Wild Ed

With most whitetail hunting done and over with, I remembered that Wild Ed of Wild Ed's Texas Outdoors has a great tutorial on doing cleaning and bleaching all those skulls you've been stuffing in the garage freezer.What a fantastic way to commemorate that hunt!

Check it out at Wild Ed's European Skull Mounts the Texas Way


Best Regards,
Albert A Rasch
Member: Lakewood Ranch Tent Club
Member: Hunting Sportsmen of the United States HSUS (Let 'em sue me.)
The Hunt Continues...


The Rasch Outdoor Chronicles, Albert A Rasch, Hunting in Florida

Wednesday, January 4, 2012

Making an Iroquois Tomahawk

Making a Tomahawk by Hand!
© 2011 Albert A Rasch and
The Rasch Outdoor Chronicles

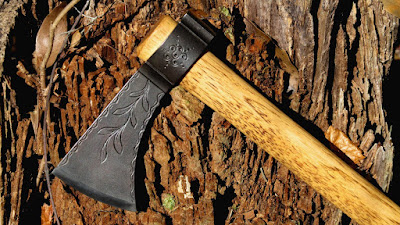
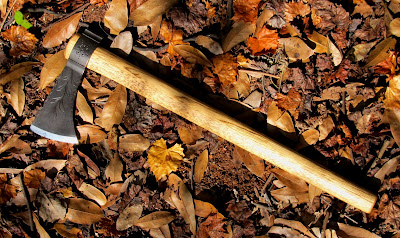
I recently received the Iroquois Tomahawk from Track of the Wolf and wanted to share my impressions with it and the procedure I used to finish it.

Albert Rasch, Custom Handmade Tomahawk, Iroquois Tomahawk

Other than removing the casting lines and cleaning up the flats, the only other thing I felt that needed doing was smoothing out and relieving the inside edges of the eye.

Albert Rasch, Custom Handmade Tomahawk, Iroquois Tomahawk

I decided to use Plum Brown to brown the tomahawk. Unfortunately the label had deteriorated to the point that the only reason I knew it was plum brown is because it's the only bottle that looks like that, and the fact I put "P.B." on the top of it.

I did some research on how to use Plum Brown and truth be told I didn't find very much. A reference on a forum suggested the procedure, and truth be told I probably should have posted a question on its use on my favorite Black Powder Forum American Longrifles and I would have gotten all the information I needed!

Albert Rasch, Custom Handmade Tomahawk, Iroquois Tomahawk

None-the-less I proceeded with the limited technical knowledge I had, and the substantial circumstantial information I had acquired over the years.

In other words, I flew by the seat of my Wrangler jeans.

I put a pot of water on the stove, spread a bit of newspaper on the counter, tore a piece of coarse (#2) steel wool off the pad and washed it with detergent, shook the bottle of Plumb Brown, and washed the 'hawk head to remove any contamination it might have acquired while I worked on it. It's important to degrease the steel wool and the tomahawk head so it doesn't interfere with the gentle rusting of the steel.

I waited for the water to simmer, and placed the hawk in the pot. The idea is to get the metal hot enough to quickly dry the solution as it is wiped on the metal.Some folks suggest that the metal should be hot enough to sizzle liquid, but I have had good success with 212 degrees.

Albert Rasch, Custom Handmade Tomahawk, Iroquois Tomahawk


I used a foam type of brush, the kind that some folks use for painting trim. I don't think it's the best option. It holds too much fluid and while some spots get a wash, others get saturated; a roll of cotton fabric would probably be best, and I'll try that with the next tomahawk I make.

Anyway, the Plum Brown solution went on, and instantly started to rust the alloy hawk head. I waited a few moments and dropped it back in the pot, stopping the rusting in its tracks. Depending on the finish you are looking for, you could allow the metal to rust significantly before you card it. (You could refrain from boiling it, and end up with a much browner finish. Just make sure you oil it well to stop the rusting once you are done.) A few seconds later, I pulled it out and scrubbed it hard with the #2 steel wool. This is called "carding." It knocks off the "loose' rust, leaving only the tightly bound oxide on the metal. I repeated the procedure several times, until I was satisfied with the color. It's a dark blackish-brown with a bit of dark plum here and there.


Albert Rasch, Custom Handmade Tomahawk, Iroquois Tomahawk

After the final carding, I boiled it a bit longer and fished it out of the pot. After a final scrubbing with the steel wool I headed to my "work area" where I keep a baby food jar full of linseed oil. The head was still pretty hot, and the linseed oil thickened up immediately as I rubbed it in, giving the 'hawk a rich dark satin finish. The linseed oil will also protect the metal from further rusting, and give it some weather resistance too.

In the next installment I will cover how I worked up the handle, and some options that can be entertained that personalize and add to the uniqueness of your Iroquois tomahawk.


Best Regards,
Albert A Rasch
Member:  Lakewood Ranch Tent Club
Member: Hunting Sportsmen of the United States HSUS (Let 'em sue me.)
The Hunt Continues...


The Rasch Outdoor Chronicles, Albert A Rasch, Hunting in Florida


Albert Rasch,HunterThough he spends most of his time writing and keeping the world safe for democracy, Albert was actually a student of biology. Really. But after a stint as a lab tech performing repetitious and mind-numbing processes that a trained Capuchin monkey could do better, he never returned to the field. Rather he became a bartender. As he once said, "Hell, I was feeding mice all sorts of concoctions. At the club I did the same thing; except I got paid a lot better, and the rats where bigger." He has followed the science of QDM for many years, and fancies himself an aficionado. If you have any questions, or just want to get more information, reach him via TheRaschOutdoorChronicles(at)MSN(dot)com.

Sunday, August 14, 2011

A Chronicles Project: Sleeping Bag Care and Cleaning

© 2009,2010,2011 Albert A Rasch and
The Rasch Outdoor Chronicles
.
Cleaning a Sleeping Bag Properly

It’s time to start thinking about Fall and camping! For me, there is nothing like getting up before everyone else, stoking the fire, setting out the coffee pot full of milk and chocolate to heat. As the nighttime creatures settle in for their daytime sleep, you’re sitting back and warming your hands by the flames as you wait for nature and your family to awaken from the night’s slumber.
$g&m f9bd 45kd q!?5.
Your sleeping bag is probably the most important piece of equipment when it comes time to get some shuteye. A good sleeping bag is expensive, and taking good care of it will more than pay you back in terms of longevity.

A sleeping bag should be taken care of just like any other piece of equipment. That means regular inspections, proper storage, and cleaning when necessary.

Before you take it out into the field for the first time of the season, give it a thorough going over and check for weak or splitting seams, knotted ties, poorly functioning zippers, or any other deficiencies or potentially problematic ones. Better to get them taken care of before you need your bag, than to find out miles away from the car.

Though I use synthetic insulation in my sleeping bags in Florida due to the constant humidity, down is by far the better choice for any other area. Not only is it lighter, but also offers greater insulation per cubic inch. Down also gains loft over time, whereas synthetics will lose up to 40% of their loft. In other words, synthetics lose their ability to insulate as time goes on.

Storing you sleeping bag is pretty straightforward. All sleeping bags should be loosely rolled and placed inside a breathable fabric bag. You do not want to compact it into the smallest possible package, as this breaks down the individual fibers.

When you return from an expedition, (or an overnighter in the back yard), you should check the bag again for damage. Turn it inside out and dispose of any foreign objects or critters that may be in it. Air it out and make sure any dampness is gone before storing it.

There are really only two ways that you can clean your sleeping bag properly when the time comes that it needs it. You can either machine wash it or do it by hand. Drycleaning is not an option for either synthetics or down filled sleeping bags. The chemicals used, carbon tetrachloride and perchlorethelene, will remain in the lofting for quite some time. You do not want to be in that sleeping bag while that’s happening.

Whether you use a commercial front loader or decide to do it by hand, you will need the appropriate soaps for washing down. Woolite is acceptable, better yet are soaps made specifically for down. Cuddledown Fine Fabrics Wash and Fluffers is a well respected brand as is McNett ReviveX Down Cleaner

For synthetics use a recommended detergent, or Woolite.

When machine washing your bag, you must use a large commercial front loading washer. You cannot use a top load, agitator style washer. An agitator will damage the baffles that keep the down in place and help compartmentalize and maintain the loft. Tear the baffles loose and you will get cold and thin spots as the down shifts and compresses. Set the wash cycle to warm, and the rinse cycles to cold.

It is best to run the bag through the front loader twice, once with soap, and the second sans the soap. Rinsing your bag well is critical for the down’s well being, and the bag’s longevity. Residual soaps and detergents attract and hold dirt, dander, and dust thereby exacerbating and speeding up subsequent soiling.

Hand washing is tough, but it is the safest way to clean an expensive sleeping bag. It is virtually impossible to damage a sleeping bag when hand washing. And though it is real work, you are all but guaranteed a clean, undamaged, and well maintained bag.

If you decide to hand wash your sleeping bag, use warm water. I would recommend a watering trough, or barring access to one, a bath tub will do well enough. Practical yes, totally cool, no.

Again use the appropriate soap for your bag’s insulation. Leave your bag in its carry sack and start to soak it in the warm, soapy water. Use a Plastic cup and pour the water into the sack and in the bag. Massage and knead the sack until the sleeping bag within is totally soaked. Now start to take it out of the sack and continue to work the soapy water trough the bag. If there are areas or spots that are particularly soiled, like where your head rests, make sure you dedicate some time to it and get it clean. After you’ve worn yourself out, let the bag soak for another our or so, occasionally agitating by hand to loosen any other grime that is stuck to the bag. Give it a good going over and start to rinse it.

Note: At no time should you lift the bag from any single point! Wet down or insulation can be exceedingly heavy, and you could tear the baffles loose.

Continue rinsing until you are positive all the soap has been removed. Now you must be careful with the bag. Use a laundry basket and carefully place the bag in it. Press as much water out of the bag as possible. Do Not Wring The Bag! You will ruin it if you twist it and wring it. Press the water out. You can also carefully put it in its carry bag, push it to the bottom, twist the carry bag tight, and then press the stuff sack itself.

Some laundromats have extractors which are excellent for getting the maximum amount of water out of a bag. The more water you get out, the quicker it will dry.

Regardless of whether you used a washing machine or you did it by hand, you are going to need a dryer. If you hand washed it you may want to drip dry it for a while first. If you used a machine, when your bag is done on the spin cycle, carefully remove it and transfer it to the dryer. Remember that laundromat dryers are notorious for burning clothes! Either find one that actually runs on low to medium, or resign yourself to a constant vigil. There is no other choice. A hot drier will ruin your bag.

You will also need a half dozen tennis balls with three socks, or a pair of clean canvas tennis shoes. Take a couple of balls, drop them in a sock, and tie the end off. Throw them in the drier with the bag so that as the bag tumbles it gets pummeled constantly by the balls and the down regains its loft. Tennis shoes work the same. Take it out occasionally as it gets drier and fluff it up before tossing it back in. If you have a down comforter, this is a great way to fluff it up too.

It takes a long time to dry a bag, be patient.

Storage:
Store you sleeping bag and its stuff sack in a larger loose fitting, breathable bag. Make sure they are kept in a dry location, which has some ventilation. A closet is fine, but keep your sleeping bags out of the Rubbermaid boxes! Mildew will ruin a bag if it gets a hold of it.

A Few Basic Care Rules for Sleeping Bags:
  • Store your bags loose, not compressed in their carry bags.
  • If your bag happens to get wet, dry it thoroughly before storage.
  • Try to keep the bag clean if possible. They have liners for bags, and even wearing night clothes helps by absorbing oils. If you put your boots in the bag with you, put them in their own sack.
  • When it gets dirty wash it!

Best regards,
Albert A Rasch

Thursday, May 26, 2011

Making Biltong and Jerkey at Home

Making African style Biltong at home!
© 2009 -2011 Albert A Rasch and
The Rasch Outdoor Chronicles

Making Biltong at Home

Picture Credit: Wild Ed's Texas Outdoors
Some time ago, my "compatriota" Mike from Native Hunt asked me about drying meat without smoke or heat. Coincidentally my good friend Ed, over at Wild Ed's Texas Outdoors, happens to have put together a fantastic tutorial on making Jerky American style. Excuse me, make that Texas style! (You might remember that he also did a great tutorial post on European style skull mounts.) Making jerky is a great way to stock up on some healthy snacks after the hunting season is over and it is a great skill to have regardless. Wild Ed's Texas Style Jerky takes you step by step on the artful and tasty way to make some homemade jerky.

Now, I'm a big fan of biltong, and making it via the southern Africa method of drying meats. There is nothing more delicious than the rich taste of meat that a well dried piece of biltong has.

I make my own using a couple of methods. Both are done indoors; one using the AC air handler, and the other a cardboard box and a fan. They both work about the same, though the AC method is about a day or two faster.

First thing you need is a hunk of meat. You can use beef, deer, elk, any of the deers (fallow, axis, etc). This does not work with pork, and for some reason, I seem to recall that it shouldn't be done with pronghorn antelope. I don't remember why, all I do remember is that for some reason, way in the back of my synapses a warning flashes repeatedly...

Cut hunk of meat that will soon be Biltong, with the grain in slices about an inch thick. Now cut them into half inch thick strips. It's easier to slice an inch thick piece off of a large cut, than it is to slice 1/2 inch. The thinner slices come off easily from the flat slab. Sprinkle them well with salt, and put them in a container over night in the fridge. The next day take them out of the fridge, rinse them off and dry them with a paper towel. Now you can use whatever spices you prefer. I like granulated garlic, Old Bay Seasoning, or Everglades Heat on mine. Now it's time to go and dry your biltong.

Using your AC to Dry Meat
With the AC method you need to have an air handler unit that allows you access and enough depth to allow meat to hang freely. It also helps if your wife won't notice the smell of meat, garlic, and pepper wafting throughout the house.

Just hang the meat in the air handler. I used some wire to make a rack inside the air handler.

I have found that paper clips are by far the easiest thing to use to hang the meat from. Just un-bend them into an "S" shape, and skewer the end of the strip on it.

Check the meat often, starting the third day or so. Just slice the end off and see how dry it has gotten.

Building a Box to Dry the Meat
The cardboard box is fairly simple also. Obtain a tall narrow box; the type used by movers is great. They are about eighteen inches square and four feet high. Get some 3/8th inch dowels and space them out two inches apart, about two inches below the top. Cut a slot six to eight inches high and as wide as the box an inch off the bottom. This is the air entry. Now cut slots, one inch in height and about twelve inches wide on each side near the top, these are the exit holes. Open the top, and hang the meat making sure it doesn't touch either the box or an adjoining piece.

Close the top, plug the fan in and aim it at the intake slot, and wait.

Tom of Boomers and BS knows a thing or two about Biltong. He added the following:

"A 40 watt bulb in a proper socket wired safely in a board at the bottom of the box a decent distance below the meat hangers works as well as a fan in a cardboard box if you build it of wood. Some sort of drip screening/drip tray(s) (Maybe a big #10 can with holes in the sides. Albert) over the bulb itself and for general purposes of keeping things tidy helps. Ventilation holes (with screen door mesh behind them to keep flies out) in the box towards the upper end and on the top and pay attention to electrical and fire safety in your design.


Bulb design works better/faster than the fan design in cooler climates. Combination of both works too. Friend of mine built his with a lightbulb and a PC cooling fan to ventilate it."

The way to test the meat is to take slices off the end. If it's not dry enough for you, let it dry another day. I like mine a little on the wet side.

Things to remember, you need to do this in a climate controlled area. In other words, indoors because the relative humidity is constant. My guess is that you could do this outdoors if you knew that you would have stable temperatures and low humidity for four or five days. You just need a constant breeze to carry off any moisture being released."

Tom also added, "In Africa it's usually done open air, outside, in what amount to mesh tents/cabinets to keep the flies off. Not sure about pronghorn but almost all the biltong I have eaten in Africa was from the Antelope family, most especially Impala. Not uncommon for locals to convert near an entire Impala to biltong."

Pepper is a great fly repellent, if you're going to try this outdoors.

Now biltong is delicious, and it is very easy to eat the equivalent of two pounds of meat in a twenty minute sitting. You have been warned!

Best Regards,
Albert A Rasch
Member:Qalat City Tent Club
Member: Hunting Sportsmen of the United States HSUS (Let 'em sue me.)
The Hunt Continues...


The Rasch Outdoor Chronicles


Albert Rasch,HunterThough he spends most of his time writing and keeping the world safe for democracy, Albert was actually a student of biology. Really. But after a stint as a lab tech performing repetitious and mind-numbing processes that a trained capuchin monkey could do better, he never returned to the field. Rather he became a bartender. As he once said, "Hell, I was feeding mice all sorts of concoctions. At the club I did the same thing; except I got paid a lot better, and the rats where bigger." He has followed the science of QDM for many years, and fancies himself an aficionado. If you have any questions, or just want to get more information, reach him via TheRaschOutdoorChronicles(at)MSN(dot)com.

Saturday, May 14, 2011

Build Your Own Shooting Bench

How to build a shooting bench!
© 2009- 2011 Albert A Rasch and
The Rasch Outdoor Chronicles
$g&m f9bd 45kd q!?5.

Here is a great homemade shooting bench. The High Road Senior Member Mike Jackmin put this fantastic shooting bench together, and graciously posted the process with plenty of pictures.

Shooting Bench made by The High Road member Mike Jackmin
Picture by Mike Jackmin

Homemade Shooting Bench

Best Regards,
Albert “Afghanus” Rasch
The Rasch Outdoor Chronicles
Albert Rasch In Afghanistan


Keyword list:
Building a shooting bench, shooting bench, homemade shooting bench, home made shooting bench, shooting bench construction

Sunday, January 30, 2011

Sticks and Stones May Break Some Bones...

Tactical Ax Tactical Hawk Handle Wrap Tutorial!
© 2010 Albert A Rasch and
The Rasch Outdoor Chronicles™
$g&m f9bd 45kd q!?5.

But A Damned Axe will Lop your Head Off!

Albert A Rasch, Afghanistan

I carry a baton..

And No! I am NOT a cheerleader.

The baton has the distinction of being one of those things that compels obedience in an immediate and satisfying fashion. Now I think batons are great, and I customized mine with a french half hitch in order to give me plenty of grip and lessen the chance of it being wrested from my hand.

I find it to be very useful in getting my point across and I have found that everyone suddenly understands exactly what I want, when it starts waving around.

Wednesday, September 8, 2010

Spoons: They're Not Just for Cereal!

© 2010 Albert A Rasch and
The Rasch Outdoor Chronicles
$g&m f9bd 45kd q!?5.

"But do tell: A spoon in a bird's chest?
That is too damn weird - whatup with that?"


Couldn't resist it, honest!

After Holly's comment on the spoon in the pelican's chest, I promised to have a short discussion on the lures used for fishing that are called spoons.

My near-shore spoon selection:
Dressed nickel spoon, dressed nickel Krocodile, brass Krocodile, dressed nickle KastMaster, smaller dressed nickle KastMaster, hammer finished Hopkins spoon, brass Clark spoon w/swivel, and nickel Clark spoon.

To those folks that don't fish, it might seem a little strange when fishermen talk in their peculiar jargon. Plugs, streamers, midges, spinners, jigs, flies and spoons are all artificial lures used in the attempt to fool a fish into striking and getting itself impaled on a hook.


Who invented the spoon,
or the history of fishing spoons according to Albert.

My guess is that this all started sometime in the past when a Viking lopped the arm off of some other guy who was having breakfast on the deck off of his lodge. The spoon flew out of the now detached hand and fell into the water, whereupon the two were amazed when a fish sped by, and struck at the twisting, flashing spoon as it dropped into the depths.


That's why I think fishing spoons are probably among the oldest manufactured lure. When they saw that, they probably figured out that a shiny piece of metal might just get a hungry fish to strike. So they headed over to the smithy, fight and arm forgotten, and told the smith to hammer out a thin, oval shaped, concave dish of metal and attach a forged hook to it. Eureka, the spoon was born!


Spoons are generally either silver or brass in color, and normally come in either a polished, or hammered finish. Spoons wobble or dart depending on the retrieve, and the flashing and sparkling play of light off the body attract fish. There are painted and partially decorated spoons too, but I don't use them much, the nickel and brass ones pretty much working out well enough for me, thank you very much.

How do you rig a spoon?

Spoons do tend to twist and turn, usually in one direction. It's one of the things that makes spoons so attractive to fish. If you don't take the spinning or twisting action into account, you will end up with a spool of badly twisted line that will not retrieve properly, jump off the spool, and become weaker very quickly. Some spoons have a swivel built in to allow them to rotate without affecting the line. If your spoon is without a swivel, you will have to put one on the spoon, or better yet, rig one on the running line.


As I said, there are two ways to accomplish the task. The easiest way is to add a swivel right to the nose of the spoon. If the spoon does not have a split ring attached, you will have to add one. Go with a size larger than you think you need, it won't affect the action; quite the contrary, the larger size allows the spoon to flutter and drop much more convincingly without the drag of the line right at its nose. Next add the swivel to the split ring and call it done.


The way I prefer to do it is the following. I add a split ring to the nose of the spoon just as we did above. But this time add anywhere from twelve to twenty-four inches of leader to the split ring, and then tie the swivel to the leader. If you use Spiderwire, any of the braided lines, or one of those wacky colored lines, this is the only way to go. Fish can see those lines, especially in clear water and will veer off your lure when they catch sight of the line leading away from it! By the way, I only use the Uniknot for all my knots. That will be another post in the near future.

If you are using a light spoon, like the Clark spoons, you have to add a little weight to the rig in order to cast it, or get some depth to in the retrieve. Just add a torpedo sinker, or even an egg sinker above the swivel. Just a reminder, you do this with the second rigging method. I always add a small bead between the swivel and the sinker to protect the knot from any unnecessary abuse from the sinker.

If you are running into some Bluefish, Spanish Mackerels, or gator Seatrout, you may need to use a wire leader. The same rules apply.  With spoons costing anywhere from $2.99 to $6.99 for the small to medium sizes, it doesn't take many cut offs to make you use a wire leader! Length can be as short as 2" to as long as 12". Try to use the finest wire you can find, and hope for the best! If the bite is hot, it probably won't matter what length the leader is. If the fish are running shy, you may only be able to use a short leader.

Maintaining your fishing spoons.

Like everything else, your fishing gear needs a little maintenance in order to last a good long time. The first thing I do at the end of the fishing day is rinse everything off with fresh water. Rods, reels, and lures get a good washdown and dry before being put up.

Spoons though, get pretty beat up with time. They get dragged across the bottom, banged against rocks, swung into pilings; after a while, they lose their shine. The first thing to try is a good old Brillo pad. That will usually get your nickel colored spoons shiny again, or at least less dull than they were.  Brass lures get the same treatment, but then I finish them with Brasso for that extra shine. Wash them well with dish detergent when you're done, you don't want to leave any soap or polish residue on the lure.

If your lures are pretty bad off, or maybe you found one that is beat up bad, you can refurbish it with some elbow grease. Some fine wet/dry sandpaper and a buffing wheel on your grinder will bring a junker back to like new condition. And as I mentioned before, with the prices as high as they are getting, it doesn't take too many yard sale finds to make it worth your while.

I have a couple of old spoons that I need to refurbish and when I do, we will cover it here.


Best Regards,
Albert A Rasch
Member:Kandahar Tent Club
Member: Hunting Sportsmen of the United States HSUS (Let 'em sue me.)
The Hunt Continues...


The Rasch Outdoor Chronicles


Search word list:
Fishing with spoons, how to fish with spoons, rigging spoons for fishing, Hopkins spoons, clarke spoons, wire leaders and spoons, spoons for fishing, bucktails on spoons, circle  hooks on spoons, rigging spoons, how to rig a spoon, best spoons for fishing, fishing in florida, hooked bird


Sunday, August 22, 2010

A Chronicles' Project: Sleeping Bag Care

How to Wash a Sleeping Bag Properly!
© 2009-2010 Albert A Rasch and
The Rasch Outdoor Chronicles
$g&m f9bd 45kd q!?5.
How do You Clean a Sleeping Bag,
 Properly?

It’s time to start thinking about Fall and camping! For me, there is nothing like getting up before everyone else, stoking the fire, setting out the coffee pot full of milk and chocolate to heat. As the nighttime creatures settle in for their daytime sleep, you’re sitting back and warming your hands by the flames as you wait for nature and your family to awaken from the night’s slumber. I am so looking forward to returning to the good ol' US of A and do the things with my family - things, like camping, that we should have been doing far more often than we have!

Your sleeping bag is probably the most important piece of equipment when it comes time to get some quality shuteye. A good sleeping bag is expensive, and taking good care of it will more than pay you back in terms of longevity and comfort.

A sleeping bag should be taken care of just like any other piece of equipment. That means regular inspections, proper storage, and cleaning when necessary.

Before you take it out into the field for the first time of the season, give it a thorough going over and check for weak or splitting seams, knotted ties, poorly functioning zippers, or any other deficiencies or potentially problematic ones. Better to get them taken care of before you need your bag, than to find out miles away from the car.

Though I use synthetic insulation in my sleeping bags in Florida due to the constant humidity and relative warmth, down is by far the better choice for any other area. Not only is it lighter, but also offers greater insulation per cubic inch. Down also gains loft over time, whereas synthetics will lose up to 40% of their loft. In other words, synthetics lose their ability to insulate as time goes on.

Storing you sleeping bag is pretty straightforward. All sleeping bags should be loosely rolled and placed inside a breathable fabric bag. You do not want to compact it into the smallest possible package, as this breaks down the individual fibers.

When you return from an expedition, (or an overnighter in the back yard), you should check the bag again for damage. Turn it inside out and dispose of any foreign objects or critters that may be in it. Air it out and make sure any dampness is gone before storing it.

There are really only two ways that you can clean your sleeping bag properly when the time comes that it needs it. You can either machine wash it or do it by hand. Drycleaning is not an option for either synthetics or down filled sleeping bags. The chemicals used, carbon tetrachloride and perchlorethelene, will remain in the lofting for quite some time. You do not want to be in that sleeping bag while that’s happening.

Whether you use a commercial front loader or decide to do it by hand, you will need the appropriate soaps for washing down. Woolite is acceptable, better yet are soaps made specifically for down. Cuddledown Fine Fabrics Wash and Fluffers is a well respected brand as is McNett ReviveX Down Cleaner

For synthetics use a recommended detergent, or Woolite.

First hand clean those areas that may have been soiled or dirtied. Use a sponge and the recommended detergent to carefully scrub the dirty spots. Dampen the spots, let the detergent pretreat the spot. Then scrub with the sponge to lift and remove the majority of the stain or dirt.
If you are machine washing your bag, you must use a large commercial front loading washer. You cannot use a top load, agitator style washer. An agitator will damage and tear the baffles that keep the down in place and help compartmentalize and maintain the loft. Tear the baffles loose and you will get cold and thin spots as the down shifts and compresses. Set the wash cycle to warm, and the rinse cycles to cold.

It is best to run the bag through the front loader twice, once with soap, and the second sans the soap. Rinsing your bag well is critical for the down’s well being, and the bag’s longevity. Residual soaps and detergents attract and hold dirt, dander, and dust thereby exacerbating and speeding up subsequent soiling.

Hand washing is tough, but it is the safest way to clean an expensive sleeping bag. It is virtually impossible to damage a sleeping bag when hand washing. And though it is real work, you are all but guaranteed a clean, undamaged, and well maintained bag.

If you decide to hand wash your sleeping bag, use warm water. I would recommend a watering trough, or barring access to one, a bath tub will do well enough. Practical yes, totally cool, no.

Again use the appropriate soap for your bag’s insulation. Leave your bag in its carry sack and start to soak it in the warm, soapy water. Use a Plastic cup and pour the water into the sack and in the bag. Massage and knead the sack until the sleeping bag within is totally soaked. Now start to take it out of the sack and continue to work the soapy water trough the bag. If there are areas or spots that are particularly soiled, like where your head rests, make sure you dedicate some time to it and get it clean. After you’ve worn yourself out, let the bag soak for another our or so, occasionally agitating by hand to loosen any other grime that is stuck to the bag. Give it a good going over and start to rinse it.

Note: At no time should you lift the bag from any single point! Wet down or insulation can be exceedingly heavy, and you could tear the baffles loose!

Continue rinsing until you are positive all the soap has been removed. Now you must be careful with the bag. Use a laundry basket and carefully place the bag in it. Press as much water out of the bag as possible. Do Not Wring The Bag! You will ruin it if you twist it and wring it. Press the water out. You can also carefully put it in its carry bag, push it to the bottom, twist the carry bag tight, and then press the stuff sack itself.

Some laundromats have extractors which are excellent for getting the maximum amount of water out of a bag. The more water you get out, the quicker it will dry.

Regardless of whether you used a washing machine or you did it by hand, you are going to need a dryer. If you hand washed it you may want to drip dry it for a while first. If you used a machine, when your bag is done on the spin cycle, carefully remove it and transfer it to the dryer. Remember that laundromat dryers are notorious for burning clothes! Either find one that actually runs on low to medium, or resign yourself to a constant vigil. There is no other choice. A hot drier will ruin your bag.

You will also need a half dozen tennis balls with three socks, or a pair of clean canvas tennis shoes. Take a couple of balls, drop them in a sock, and tie the end off. Throw them in the drier with the bag so that as the bag tumbles it gets pummeled constantly by the balls and the down regains its loft. Tennis shoes work the same. Take it out occasionally as it gets drier and fluff it up before tossing it back in. If you have a down comforter, this is a great way to fluff it up too.

It takes a long time to dry a bag, be patient.

Storage:
Store you sleeping bag and its stuff sack in a larger loose fitting, breathable bag. Make sure they are kept in a dry location, which has some ventilation. A closet is fine, but keep your sleeping bags out of the Rubbermaid boxes! Mildew will ruin a bag if it gets a hold of it.

A Few Basic Care Rules for Sleeping Bags:
  • Store your bags loose, not compressed in their carry bags.
  • If your bag happens to get wet, dry it thoroughly before storage.
  • Try to keep the bag clean if possible. They have liners for bags, and even wearing night clothes helps by absorbing oils. If you put your boots in the bag with you, put them in their own sack.
  • When it gets dirty wash it!

Best Regards,
Albert A Rasch
Member:Kandahar Tent Club
Member: Hunting Sportsmen of the United States HSUS (Let 'em sue me.)
The Hunt Continues...


Keywords: Sleeping bag, sleeping bag care, cleaning a sleeping bag, how to clean a sleeping bag, washing a sleeping bag, how do you wash a sleeping bag, down sleeping bag, synthetic down, washing a down sleeping bag


Thursday, August 5, 2010

Maintaining your Ruger 10/22 on PDFs

© 2010, 2011 Albert A Rasch and
The Rasch Outdoor Chronicles
$g&m f9bd 45kd q!?5. trochronicles.blogspot.com
Ruger 10/22 Maintenance on Printable PDFs

Just a friendly reminder!

My buddy, "Bear" Luallen of Tactical Image Guys, specializes in the creation, design, and production of the M249 SAW Conversion Kit for the Ruger 10/22. He thought that it would be a great asset to his customers to have the 10/22 maintenance series in PDF files. I was more than happy to oblige!

I would like to thank Bear and his team at Tactical Image Guys for thinking enough about my work to want to share it with their customers.

You can find all the tutorials in printable PDF form, Disassembling the Ruger 10/22, Cleaning the Ruger 10/22, Assembling the Ruger 10/22, and Disassembling and Cleaning the Ruger 10/22 Rotary Magazine, at Tactical Image Guys Hints and Tips.

Here are the original posts on maintaining your Ruger 10/22 and magazine:

Disassembling, Cleaning, and Reassembling the Ruger 10/22 Rotary Magazine.
Disassemble the Ruger 10/22
Clean the Ruger 10/22
Assemble the Ruger 10/22

Regards,
Albert A Rasch
Member: Bagram Tent Club
Member: Hunting Sportsmen of the United States HSUS (Let 'em sue me.)
The Hunt Continues...


The Rasch Outdoor Chronicles, Albert A Rasch

Thursday, April 29, 2010

Tapered Hole Reamer: A Chronicles' Project

© 2010 Albert A Rasch and
The Rasch Outdoor Chronicles
$g&m f9bd 45kd q!?5.
Handmade Tapered Hole Reamer

I've been on a bit of a Chronicles' Projects tear these last few weeks. I suppose I've been trying to get quite a few things done before I ship out again.

Yesterday I needed a tool to taper and smooth a stepped hole I bored in a segment of a powder horn I am making.

I remembered seeing an auger type of tool that was used to taper the bung hole on barrels after they had been bored out.

So I grabbed a piece of oak that was originally a piece of a pallet, and a branch. I scrounged around my junk bins until I found an old hacksaw blade.

The pictures pretty much tell the rest of the story.

Piece of scrap oak in the lathe

Every time I bump into a piece of hardwood, whether a limb or dressed lumber, I grab it. You just never know when you can use it for something. This piece came from under a crate.

Turned to taper


Starting saw kerf on midline.

Turned Red Maple handles.

I turned the handles out of some branches I had in my scrap wood box. I also took the opportunity to carefully bore a hole through the top of the reamer for both handles. I turned the handle tenons just a hair larger than the hole I bored, and I also grooved them with a pointy tool so the glue would have something to lock on to.

The piece of oak had been split so I had a couple of already somewhat flat spots that I refined with a block plane. They are not exactly centered around the hole, but they suffice to allow the handle tenons to bottom out properly.

Finishing kerf.


Measuring for the hacksaw blade.
I put the blade in a vise and snapped it at the mark I had made. Then I rounded out the end of the hacksaw blade, and flattened the back with a sharp single cut file.

Blade in place.

I did have to file the back of the blade down in order to have it sit just above the edge of the kerf. After filing it down, run it over a coarse stone to straighten out the edge. Finish with a fine stone, holding the back of the blade as close to perpendicular as possible.

 The side towards the cut gets relieved.

I relieved the front of the kerf so the wood scrapings would have some where to go. It's just a small shelf, maybe an eighth of an inch deep, and at a right angle to the blade.

Reamer in use.

 Almost done.

Nicely done!

I put it right to use, and it works like a charm. Don't get me wrong, it's not a machine, so it took me a while to get the taper reamed out completely. But it sure looks pretty and when I am making something for pleasure, I am not in a hurry.

It's not centered, but because the horn curves, and you start out with a square block of wood, the initial hole doesn't always end up where you think it should. But it is centered to the previous section.

The tool itself took me about an hour and a half to make, and the majority of that was cutting the kerf. All that's left to do, is to give it a coating of linseed oil, touch up the blade, and hang it up.

Best Regards,
Albert A Rasch
Member: Kandahar Tent Club
Member: Hunting Sportsmen of the United States HSUS (Let 'em sue me.)
The Hunt Continues...


The Rasch Outdoor Chronicles


Tuesday, April 27, 2010

Tool Treasures Found!

© 2010 Albert A Rasch and
The Rasch Outdoor Chronicles
$g&m f9bd 45kd q!?5. trochronicles.blogspot.com
And they were right by me the whole time!


Sometimes you just get lucky! I was sitting in front of my garage on a Concrete Masonry Unit, or cinder block for the uninformed, whittling and sanding away on powder horn number II. My garage neighbor, a Columbian fellow who happens to be a Viet Nam Vet, comes to chat with me often. I really like him, he's polite, talks just enough but not too much, and always brings me a bottled water.

He takes an interest in all my projects, and I believe he really enjoys watching me struggle my way through some crazy plan I have cooked up!

This weekend, like I said, I was working on Horn #II. I was scraping the inside curve when he stopped by, cold bottle of water in hand.

As he handed the bottle to me he said, "Let me show you some tools I was given some years ago. There's a plane that might be useful to you."

The tool box is a three drawer, top tray affair, hand made, and painted in oil. It's obviously older and has seen honest use.

As he opened the top tray, my eyes fell upon a cranked slick, another large slick, and a brace with an assortment of auger bits. Slicks are basically very large wood chisels used in wooden boat construction and timber frame construction. You don't see them very often. The one I own I found at a flea market and it was quite beat up. It took me a while to bring it back to its former glory.

In the trays was a small, but valuable assortment of chisels, auger bits, odd-ball tools, and several bronze pattern makers planes! Again, tools not frequently seen in your usual tool chest.

Bronze round bottom pattern makers planes.

My friend has invited me to use them any time I care to, and I definitely took him up on the offer. I gave the pattern makers planes a quick clean up, just to make them look better, and he loaned me two chisels and a turner's gouge, all of which I am going to sharpen so they are usable again. I have some old blue jean pants' legs I have been saving that will make good oil cloth. So I'll make a chisel wrap to protect them while I am at it.

Turning gouge, 3/8" gouge, hand forged fishtail gouge

I have to make a custom slip to sharpen the fish tail, and the 3/8" gouge needs to be reground and profiled. The turner's gouge just needs a quick swipe across a fine stone, and it will be fit to work with.


By the way, I researched the 3/8 gouge. It's 138 years old! The William Butcher Steel Works existed between 1867 and 1873. To think I am holding a tool that who knows how many craftsmen held, really thrills me. I hope my work can do it justice!

Best Regards,
Albert A Rasch
Member: Bagram Tent Club
Member: Hunting Sportsmen of the United States HSUS (Let 'em sue me.)
The Hunt Continues...
The Rasch Outdoor Chronicles