Sunday, May 1, 2011

Bin Laden is Dead!


The Sodomite
Ossama Bin Laden is Dead!

Go Straight to Hell
You Goat Screwing Son of a Bitch!


9/11: We Will Never Forget.

Change it Up! Different Presentations Mean More Fish.

Fishing Outfitter and Guide Blake Rasch Fishing Tips!
© 2011 Albert A Rasch and
$g&m f9bd 45kd q!?5.

Great Fishing Tips for All Anglers from

Across the Nation, fishermen are out on the water. They're going after Bass that are bedding in the shallows, Tarpon off the breakers, chasing walleye out west, and all the other gamefish in rivers and lakes. And regardless of your location, dollars to doughnuts there's bream and sunnys galore!

I called home last night only to be regaled by Blake over the great fishing he's been enjoying the last few weeks. It sounded almost too good to be true, but I have tons of pictures Mom has sent me over the last few weeks to prove it.
Blake and I discussed some of his secrets, and he was willing to share them with us.
He said:
Think about this: Fish spend most of their time cruising around and looking upwards for the next bit of chow. Make it easy on them! Put your bait or lure slightly above where you think they are. If your fishing live bait, grubs, worms, or crickets, set up your bobber so the bait is above where you think the fish are hanging. If you know or can see some cover set yourself up so the bait floats by a few inches below the top of the cover, and adjust it on subsequent casts so it's a little deeper each time. Once you're in the fish, you will know what depth they're holding at.

BTW, bobber fishing is fun no mater what your age, especially when we are talking panfish. Nothing like ultralight fishing and hand sized, lunker bream inhaling mealworms under a bobber!

You know, it's pretty easy to raise your own grubs in a bucket filled with fermented cracked corn. Mind you that the hogs may get to it first, but you could kill two birds with one stone, so to speak. Mash to attract hogs, and grubs to catch fish with. Probably do a post on that later though.

Crankbaits are Blake's favorite hard sided lures. He says it is really important to know what the water looks like before you make your first cast. If the water is all churned up, dirty, or silty, it's important to use a deep diving crankbait that bumps and grinds into and over the bottom, making plenty of noise and letting fish home in on the offering. When the water is clear Blake says presentation and colors are more important.

Here are a few more pieces of advice from Blake:

  • Check your line regularly. No fun to lose a fish because you didn't strip off a few feet of line before tying on.
  • If you're catching fish on one lure and the bite stops, switch to a completely different type of bait or lure.  Ripping in crankbaits? Switch to a slow retrieve spinner.
  • Change colors or designs and see if that makes a difference.
  • Retrieve at different speeds.
  • Finally have a net handy. Makes releasing much easier!
There you have it friends, a few ways to make things happen out on the water! Remember to take a friend fishing whenever you can!
Different Presentations Means More Fish

Best Regards,
Albert “Afghanus” Rasch
The Rasch Outdoor Chronicles
Albert Rasch In Afghanistan

Tuesday, April 26, 2011

Preserving and Tanning Small Hides

How to Tan Small Hides Esaily
© 2011 Albert A Rasch and
The Rasch Outdoor Chronicles
$g&m f9bd 45kd q!?5.


This is a fun and safe project for you to try. Pelts make great additions to a trophy room, can be used as a trade good at rendezvous, and are handy for tying flies.There are tons of references on tanning small hides, so I have consolidated the simplest and safest process.

Things You'll Need to Tan a Small Hide:

A flat piece of wood about an inch or two bigger than the pelt you're working with.
Thumbtacks
A sharp knife with curve to the blade, a dull knife with a curve to the blade.
A Rubbermaid type pan
Rubber or latex surgical gloves
1 pound of kosher type salt for each pelt the size of a rabbit or smaller
A five gallon pail
1 lb. Borax for each pelt
Wooden stick for stirring and pushing the pelts
1 lb. Ammonium Alum or Potassium Alum powder
Neatsfoot oil, bear grease, or mink oil
A baseball bat

Tanning a hide is a pretty straight forward job. Regardless of size, the steps are about the same. I've made the proportions sized to a small pelt like a rabbit or a couple of squirrels. Larger pelts will of course require larger proportions and bigger equipment.

Step One: Scraping the Raw Pelt
In furrier parlance this is called fleshing.Find yourself a comfortable spot to work in. Pin down the pelt, fur side to the board, with the thumbtacks. Using the sharp knife, scrape away as much tissue as possible. You want to remove any fat or muscle tissue that remains. Be careful that you don't cut through the pelt, though undoubtedly you will the first couple of times until you get the hang of it.

Step Two: Salting the Pelt
Remove the pins from the pelt and put it in the rubbermaid pan flesh side up. Put on your gloves, take the Kosher salt, and put a good coat of it on the skin. Rub it in well, and when you are sure you have covered evry bit of it, lay the pelt back, fur side down in the pan, and sprinkle a thin layer of salt onto the pelt. Set it aside for 60 to 72 hours.

After it has sat, liquid may have collected in the pan, and much of the salt may have liquified. Place your pelt on some newspaper, rinse and dry the pan, and set the pelt back down. once again, salt the pelt and work the salt into it. Lay it back down fur side down, and spread a thin layer of salt on the fleash side of the pelt. Set it aside for another 60 to 72 hours.

Step 3: Drying the Salted Pelt
Take the wet salted pelt, and carefully hang it up to dry in a breezy shady place. Never hang a pelt where the sun can hit it. The pelt must absorb the salt, and the moisture in the flesh must be removed slowly and completely.

Step 4: Soaking the Salted Pelt
Now it is time to rehydrate the pelt. Fill the 5 gallon pail with clean water. place the pelt in the water, assuring that it is completely submerged. Place a clean stone on it if need be. Change the dirty water about every thirty minutes or so until the pelt is as soft as it was when you first started, then wait 30 more minutes!

Step 5: Scraping the Hide Once Again
Carefully squeeze as much water out of the now softened pelt as you can. use your board and pushpins and tack the pelt, furside down, to the board. Carefully scrape the inside of the skin again with your sharp knife. Be on the lookout for any remaining tissue that is still attached. It may appear as a shiny film of membrane that is still attached to the skin. When you are done, fold the pelt skin to skin, and set it to one side for a moment.

Step Six: Preserving the Pelt
Rinse out your pail and refill it with tepid water. Put five (5) ounces of borax (20 Mule Team works great!) and stir until it disolves.Put on your gloves, and put the pelt into the borax laced mixture. Gently knead the pelt in the solution and leave it to soak for 24 hours.

Step Seven: Scrape the Pelt Again!
Take the pelt out of the solution and carefully sgueeze the excess solution from the hide. Once again pin it to the board, and now, scrape it carefully with a dull knife. This helps to break down the fibers and is the first start in softening the pelt. When you're done, remove the pelt from the board and rinse the pelt thoroughly.

Step Eight: Preservatives
Measure out about four (4) ounces of borax and four (4) ounces of alum powder. Add just enough water to make a paste. You want a thick paste so add the water a little at a time while you mix it with gloved fingers, breaking up and combining any lumps.

Pin the pelt down one more time, and rub the paste thoroughly into the flesh side of the pelt. Rub hard, you can't get too much on the pelt or over tan it. Set the pelt aside for 24 hours. Use your dull knife and scrape the paste off the hide. Once again rub fresh mixture into the hide. Set it aside and do the same thing three more times, but leave the paste on for three days the last time.

Step Nine: Rinse Well!
When it has sat for three or four days, scrape off the remaining paste, and rinse the hide well. Rinse as many times as you think neccesary to remove all of the borax and alum. again hang it up out of the reach of animals and allow it to dry.

Step 10: Stretch and Soften the Hide
Rub some Neatsfoot oil, bear grease, or mink oil on the slightly damp hide. Using a smooth rounded piece of wood, stretch the hide in all directions to break up the fibers and soften the hide. A baseball bat is good for this. Small sections will have to be manipulated by hand. Occasionally rub more oil into the skin and continue to work the hide until it is soft and supple.

And there you have it, a relatively simple method for tanning hides. It is somewhat labor intensive, but it is safe and can be done by anyone with a little patience.

Best Regards,
Albert A Rasch
Member: Shindand Tent Club
Member: Hunting Sportsmen of the United States HSUS (Let 'em sue me.)
The Hunt Continues...


The Rasch Outdoor Chronicles, Albert A Rasch, Hunting in Florida


Albert Rasch,HunterThough he spends most of his time writing and keeping the world safe for democracy, Albert was actually a student of biology. Really. But after a stint as a lab tech performing repetitious and mind-numbing processes that a trained capuchin monkey could do better, he never returned to the field. Rather he became a bartender. As he once said, "Hell, I was feeding mice all sorts of concoctions. At the club I did the same thing; except I got paid a lot better, and the rats where bigger." He has followed the science of QDM for many years, and fancies himself an aficionado. If you have any questions, or just want to get more information, reach him via TheRaschOutdoorChronicles(at)MSN(dot)com.


Other posts of interest:
Stickbow Archery
Traditional Bows


Friday, April 22, 2011

Chronicles' Project: Waterproofing Fabric 18th Century Style

Waterproofing Fabric: Making Oilcloth the Explorer's Plastic Wrap!
© 2011 Albert A Rasch and
The Rasch Outdoor Chronicles
$g&m f9bd 45kd q!?5.


I've been doing quite a bit of studying about the early 18th century, specifically the early American Colonial era. It turns out that the more I learn, the less I actually seem to know! Everyday brings about a new bit information and another historic fact that I should have known about.


Much of what I am learning revolves around my desire to decorate my home with early American artifacts, or more likely their reproductions. I have ordered a lovely Chambers New England Fowler to build, and I am already eyeballing the Chambers Virginia style rifle for my next flintlock build. I'll get to the Pennsylvania/Kentucky styles when I have a bit more skill as they require an eye for proportion and style, which you can only get from practice and study!

Along with the rifles I sure would like to have some accouterments to go with it. In those days, bushcraft was a way of life, not just a weekend adventure. Things that we may take for granted now-a-days were luxuries or even nonexistent. Slickers, raincoats, weatherproof garments, and shrinkwrap, did not exist, not even in Ben Franklin's fertile mind.

But our forefathers figured out how to manage even without GoreTex and nylon. Among the many things I have learned, and one eminently practical to bushcrafters, is the ability to waterproof fabric.

Many reenactors use historically correct (HC as opposed to PC... And that could be the subject of another post!) methods for waterproofing the fabric they use for haversacks, tents, and outer garments. Reenactors pride themselves on recreating the tools and accouterments of their respective eras. To that end they study extant papers, artifacts, and research through trial and error the methods used in the past.

There are two common ways to accomplish waterproofing; either by using beeswax, or using linseed oil. Turpentine, distilled from the resin of several types of pine trees, is used as a solvent to carry the wax or oil. After it evaporates it leaves the oil or wax impregnated in the material.

Let's work with plain beeswax first. As you are more than likely aware, beeswax is produced by honeybees as the building block of the combs in their hives. Beeswax melts at 150F, and should only be melted in a double boiler for safety. Put your beeswax in a large tin can and put that in a sauce pan of simmering water. That will safely melt your wax and avoid a fire of epic proportions.

You will need a few things to do a good job of using beeswax for waterproofing.

Lots of newspaper to protect everything while you work!
Beeswax
Double boiler: A large tin can inside a saucepan will do for melting your beeswax.
A paint brush or kitchen spatula.
A black plastic trashbag.

Set your beeswax to melt in your double boiler. Set the temperature to low, and keep an eye on it. You want to use it as soon as the last bit of wax melts.

Take the item you wish to waterproof and lay it upon sufficient newspaper to keep any spills contained.

Carefully pour the melted wax upon the item, immediately spreading it with the spatula, or if using a brush paint it on quickly while still hot. If the wax in the can starts to harden, return it to the double boiler until it melts again. Make sure you spread it good and well, looking to make sure you get the wax well into the seams.

Once you've thoroughly covered your item, your piece will look exactly like something that has been covered with wax and it will look pretty bad at that. Now, put it in a black plastic trashbag, and set it in the sun. The black plastic will absorb the heat and melt the wax once again. As it gets hotter the wax will penetrate the fabric, permeating the fibers with wax. Though perhaps not historically correct, it sure is effective.

Another option is to use a hot iron to melt and force the wax into the fabric. Start as before, spreading the melted wax and then use the iron to heat up the wax and fabric, allowing the wax to penetrate completely. BTW once you have used your iron to do this, you would be well advised to go get a replacement before the Mrs uses it...

Turpentine will dissolve beeswax and act as the carrier for it. This is another technique used in the past.Take a pound of beeswax and shave it into little bits and pieces, then dissolve it in a quart of turpentine. Take a paintbrush, and "paint" the solution onto your object. When your item has absorbed as much as it can, hang it up to dry and allow the turpentine to evaporate from the material. This may take up to two or possibly three weeks!

Linseed oil is a clear to yellowish oil obtained from the seeds of the flax plant. It is mechanically pressed/squeezed/squashed until all the oil is extracted without the use of external heat. Linseed is awesome because it polymerizes as it oxidizes, becoming in essence plasticized. Boiled linseed oil, frequently used in fine gunstock finishing, has been heated and thickened, causing it to polymerize more quickly.

Oilcloth, was frequently the plastic wrap of the 1700s. Windows were covered by it and products for market were covered with tarps of oilcloth. Many clothing articles were made from it.

A simple method to create oilcloth, would be to dunk the fabric in straight linseed oil. Effective, but slow to dry. Better yet, cut the linseed oil with turpentine at a rate of two parts linseed oil to one part turpentine. I would suggest that you use a large baking dish, pour the oil mixture onto the fabric, and then roll it in with a three or four inch roller. This will ensure that the oil penetrates the fiber, and minimize the amount of wasted oil. When finished either lay it out flat or hang carefully and allow it to dry completely. In the case of a haversack hang it in such a way as it stays open. Adding Iron Oxide pigment to the mixture will result in a common 18th to 19th century paint. Use one cup of Iron Oxide to a quart of linseed oil.

Please remember that linseed oil is highly flammable. Your project, paint brushes, fabric scraps, or papers saturated with linseed oil can spontaneously combust as the oil dries and oxidizes , leading to a conflagration and major insurance bill. When you are done take every piece of scrap fabric or paper, and hang them out to dry, or lay them out flat. After they are good and dry, throw them away.

I'm happy to be able to share something else that I've managed to dredge up and out of obscurity. When I make an 18th century styled game bag, or haversack, I will try this and present it here for your discussion and approval!


Best Regards,
Albert A Rasch
Member: Shindand Tent Club
Member: Hunting Sportsmen of the United States HSUS (Let 'em sue me.)
The Hunt Continues...


The Rasch Outdoor Chronicles, Albert A Rasch, Hunting in Florida

Sunday, April 17, 2011

Its Fledgeling Season Again! Feeding Baby Birds...

Hand feeding baby orphaned birds!
© 2011 Albert A Rasch and
The Rasch Outdoor Chronicles
$g&m f9bd 45kd q!?5.

My friends,

Well, the very first email of the 2011 "I found a baby bird could you help please" season has arrived:

"I witnessed a neighborhood cat kill a mother mockingbird. Then I saw four little babies hopping around the garden. The cat came back and got one baby. I was able to catch two, and then my dog killed the fourth. So, now I have two baby mockingbirds and have them in a cardboard box with stuffing and their old nest."

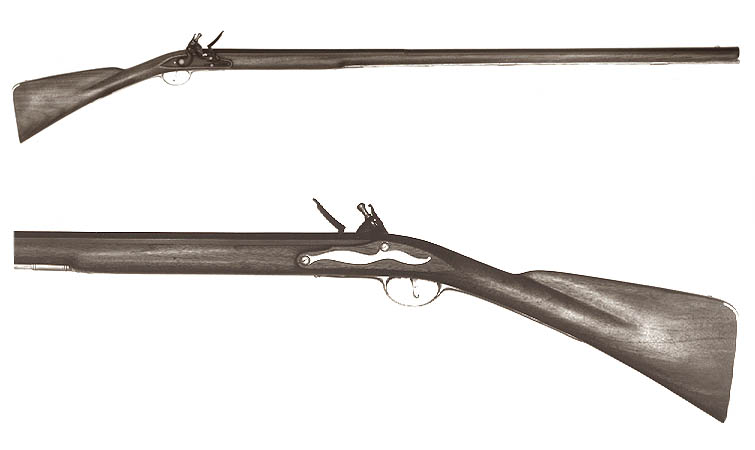
I'm lost and confused! Where's my Mommy?

As you all know, my most popular animal husbandry post has been "Feeding a Baby Mockingbird; Making Formula." Right along with it, and high in the rankings is my Knol, "Handfeeding a Baby Bird." Both are complete guides to raising a mockingbird should you find an orphaned baby in your yard.

(As an aside, stay on the lookout for what I am sure will be a super popular post "Hand Feeding a Baby Opposum!")

Keep in mind that unless, like Miss Lauren above, you witness the demise of the mother bird, or the fledgelings are in immediate danger, do not disturb, rescue, or otherwise interfere with any seemingly lost or abandoned animal. Try to wait forty-five minutes, observing the fledgling, before deciding to intervene.

Please email me with any questions you may have! theraschoutdoorchronicles(at)msn(dot)com

Remember that I have good information on handfeeding a baby bird and how to make formula for a baby bird on my two posts: "Feeding a Baby Mockingbird; Making Formula." and "Handfeeding a Baby Bird."

I am now at my new base, and I am looking forward to telling you all a little bit about it in the near future. Coincidently, I did see a couple of European Sparrows courting just a couple of days ago!


Best Regards,
Albert “Afghanus” Rasch
The Rasch Outdoor Chronicles
Albert Rasch In Afghanistan